Monday, November 24, 2014

DIY *Hard water friendly* liquid laundry detergent (also borax free!)

Hey all!

So a few weeks ago I posted our laundry detergent recipe. It is a fantastic recipe and it really gets our clothes clean.... but... I have come to encounter our mean, gross, and frankly just RUDE friend hard water.

Ugh.

I really don't like hard water. But it is everywhere... so I guess I will just learn to work with it.

So after making the last batch of the laundry detergent, I noticed that we were starting to get some white hard water deposits (I call them calcium stains) on our cloth diapers. I also noticed our towels were getting a little grainy feeling. These are two large issues in our house. Calcium stains on cloth diapers= pee and poop everywhere. The deposits prevent the absorbent inserts for absorbing as much as they usually do... and need to. As a family of heavy wetters (yay......) we are kind of used to having to change diapers often and are used to keeping an extra outfit handy, but it was starting to get out of control. Also, the towels are a HUGE issue. We have our 4 year old who is ridiculously picky about textures... He was NOT a fan of the towels getting even a little stiff. The 2 month old wasn't a fan either. I don't buy "baby towels" I think its pointless because they grow out of them so fast and then you just have an over sized rag. So, it is SO important we DON'T have scratchy towels. Luckily, she isn't THAT picky about it... but I'd rather her not be uncomfortable.

Anyways, my point it that it was exceedingly important to fix this issue.

Since I had just made a new batch of laundry detergent, I had to use it before I made a new and improved formula. While I was doing this, I combated the calcium stains by adding about a half of a tablespoon of citric acid to every load. I should note, we use hot then cold water for our laundry since we are washing diapers. This COMPLETELY removed the issue after one wash. No more deposits... diapers working again, soft towels. Jackpot.

Now my next step was to make my life easier. I am not a fan of having to do an extra thing with one hand (and a crying baby in my ear... she hates laundry time for some reason).

This is my solution:

I used the same formula from my other post (which is below) but added 5 tbsp of citric acid. 

Since I was doing this with the famous one hand parent dance (I hadn't finished my baby carrier yet)... I didn't take new pictures. Maybe next time I will, but for now, I will use the old ones and add explanation for the addition. 

Ingredients:

Super washing soda
Liquid Castile soap ( I usually use Dr. Bonners baby mild, but any will work)
Water
the option of essential oil (I use lavender)
Citric acid (I buy mine in bulk on amazon)
And, of course, something to put it in (1 gallon size)-- I used an old laundry detergent jug.


What to do:

Put 3/4 cup of super washing soda into 1 cup of VERY  hot water. 

Stir water and washing soda until it dissolves... this is kind of a pain since it likes to sit at the bottom when it gets hot. Pour it into the container. (careful not to burn yourself! use a funnel if it helps!)

**** THEN*** (this is the new part!) 

Dissolve 5 Tbsp of citric acid in 1 cup of hot water... stir it until it is COMPLETELY dissolved. 

Pour this into your container SLOWLY!! It is going to fix and if you do it too fast, it will make a huge mess! 

I don't suggest adding more citric acid. You want to keep it at about a 1:4 ratio (citric acid:cleaning agent) to make sure your clothing is still getting cleaned!
Add 6 tablespoons of Castile soap, mix well.

Slowly fill up the remainder if the space in your container with cool water. The key is to do it slowly so you don't make a ton of suds. 

This is where you would add your essential oil. I usually add about 20 drops or so. Just until I like the smell. :)
Now, mix it with a long spoon handle or something like it. Don't shake it, you want to avoid making suds! 

Voila, just like that, you have some liquid laundry detergent.

use 1-3 tbsp per load

Also, If you are still having problems with hard water after this (which I HIGHLY doubt since we have some of the hardest water in the US, and we don't have any issues wit this formula) you can add a citric acid to your rinse cycle... Maybe a 1/2 tablespoon. Use your best judgment!

Also, see the original post for more information!

Wednesday, November 19, 2014

The sweetpod... A DIY ergo

Hello friends.

I am resurfacing from baby land and some quality time with my sewing machine.

I have just completed the second most wonderful thing in my life. The first is my children, second is this beautiful baby carrier.

Okay so maybe I'm being a little dramatic, but I'm seriously so proud of it. It took a lot of time and effort and it was worth it! 

I bought this pattern and followed her directions to the T and it worked out wonderfully. 

I meant to document it but as soon as I started it I got all wrapped up (no pun intended,ha) and forgot. It took me a week or so to finish it, mostly because I have a 2 month old who needs to eat and be loved and a 4 year old who needs his mommy jungle gym. I think in real time it would have taken me a good party of 2 days to complete. Maybe less? I really have no idea.

There were two "hard" parts to making this carrier. 


One: Ordering all of the buckles and materials. I was lucky enough to have all of the fabric and padding I needed on hand but there is a lot more to this project. You will need (or it will make it easier) to have a concealed zipper foot on a good sewing machine with a new needle (and a few back ups, just in case). You'll also need to order the buckles. I strongly recommend following her advice and going with Seattle fabrics for the buckles and other materials. The shipping seems high but they are really good quality buckles and I feel confident they will last with my little one. It took about a week to get everything in-- which seems like a lifetime when you are waiting to get started. for all of the buckle, cording and shipping I paid about 20$. I thought this was pretty awesome since the pattern is only 14$ and I had all the other materials making this really nice ergo only cost me 32$. If you don't have the fabric, buttons and padding on hand, the whole project would probably cost closer to 60$, is my guess. That is half of the price of a Ergo carrier and still less than you can but a used one. I also prefer the one I made because I got to use fabric I like and I made the lining out of old sheets that I LOVED because they were so soft so I know my baby girl is comfortable.

Two: Sewing on the zipper. I just don't like sewing on zippers. I had to redo my zipper twice because I just really don't know how to do it, I guess. I would suggest using youtube as a resource if you don't know how to do it. Mine looks really good somehow though, haha. I couldn't tell you how I did it but it looks professional and works perfectly. Also, you could probably omit the pocket all together, if you didn't want to do the zipper. I like it though because it gets the hood out of the wind (we live on a very windy lake) so it doesn't hit me or my little one while we are out walking.

Everything else was relatively easy. There are some parts where I had to go pretty slow to avoid breaking my needle. I feel like my sweet pea is really safe in it and I know the construction is good. I would feel comfortable putting my massive 4 year old in it too, if I didn't think I would break my back. I also like the inner panel because it curves, making it easy for me to take her out and nurse.
She loves it, too!


Next I will be making the bag that goes along with it!
I think I might make some teething pads for it too! Ill keep you posted!!

Other notes:

If you have a baby that is younger than 6 months, you might want to have a newborn insert as well! You can make one... I like this tutorial, although I haven't made one and don't plan on it either... but that will save you a ton of money and you can make it out of the same material as your lining and it would be beautiful!

Although I strongly recommend this pattern and instructions, I found this free pattern for a similar, yet slightly simpler carrier. I haven't made it (or really even looked at the instructions), but it looks nice! Maybe I'll let my hubby choose some fabric and make one for him!


Sunday, November 16, 2014

DIY easy cloth diaper wipes

We LOVE using cloth diapers. It makes life a lot easier for us. Not to mention, like I've said before in my wipe solution and diaper cream posts, baby girl has seriosly sensitive skin and store bought diapers and wipes needed to go.

I decided to make these extremely inexpensive and easy wipes after my husband complained about me throwing store bought wipes into the washer with the diapers--oops! 

These will save us an amazing amount of money. Apparently I use too many wipes per diaper change (according to the husby), so this was a necessity. I usually only use one wipe per chance where I used to use 3-4 disposable wipes. It also has the added bonus of being able to dry my sweet ones tush after its clean-- also a bonus for the anti- diaper rash movement. 

I used old baby blankets (and I mean OLD... They were mine as a child), but you could just get a yard of cotton flannel or cotton jersey (more or less depending on how many you want to make!)

Cut fabric in 6" squares.

Put 2 squares together. Make sure you have WRONG sides together.

Zig zag stich all the way around the square. If you have a serger, serge it, but a zig zag will do the trick.
If you want to make it a mock serge stitch, make sure your needle goes just to the right of the fabric so one stitch is on the fabric and the other is off. I didn't do this.. I just stitched 1/8- 1/4 inch in from the edge... Mostly because it is a lot easier and I was trying to do this fast! 
Fold them in half


You can put it in an old disposable wipe tub to store
That's it! Use with some DIY wipe spray!


DIY easy cloth diaper wipe spray free of harsh chemicals

Little girl has been having a rough time with diaper rash and other skin irritations since she was born 2 months ago. It seems she got her daddy's ultra sensitive skin. I would say poor girl but her daddy's skin is also naturally flawless so I can't feel too bad for either of them, haha.

I hate seeing my little girl uncomfortable, so I have made it my priority to remove any chemicals that may irritate her skin

Since we already got rid of store bought diaper rash cream, store bought diapers and store bought wipes... It seems as if it is time to remove the store bought wipe solution as well. 

What you need:


1tbsp Which hazel
3 tbsp Liquid aloe Vera
essential oil- I use 4 drops lavender
1 tbsp Moisturizing oil- I use jojoba oil
5oz spray bottle
4tbsp Water

What you do:

Put all of the ingredients in the bottle and shake it a little. Easy as that!
As always... research the EO you use from peer reviewed sources before using it!! They can be harmful and/or irritating!

To use:

Shake it up.
Spray it directly on baby's tush or spray on the wipe.
Clean baby as usual.


Friday, November 14, 2014

Easy Diaper Rash Cream

Since the little miss was born almost 2 months ago, we have spent a lot of that time battling diaper rashes. Her skin seems to be extremely sensitive to pretty much everything. We've used A&D ointment and Butt paste but neither seems to be doing much. We also just started using our homemade diaper liners for our gDiapers and my homemade faux gDiapers. This posed another issue in the tushy department. Butt paste and A&D don't wash off easy from cloth. They can actually ruin the absorbency of some fabrics. This is where my usual "I'll just make something" came into play.

I just used what I had laying around and something I knew would wash well but still help my sweet one fend off the diaper rash.

What you need:

1/4 cup coconut oil
Essential oils- I used 10 drops of lavender
Stove pot
4 oz glass container

What you do:

 Put coconut oil in a small pot


 Heat the coconut oil until it is completely clear on low setting. Be careful not to boil or burn it.


Put 10-15 drops of your EO into your 4oz glass. Make sure you research your EO from a peer reviewed source before using it on your babies skin! Some are bad for little ones and/or can cause irritation. I chose lavender because it is proven to have a calming effect on some people. Im always down for a calm baby, haha.


 Pour your coconut oil into your container & mix.
 Put it in the fridge to cool completely. Its done when it's solid and white.
 Label it :)
 You only need to use a TINY amount. you can keep it refrigerated or just be sure to discard it if it smells funny or you see any irritation on your baby at all. My little girls bum loves it. It also smells lovely! I'll never use store bought cream again! Enjoy!

Happy Baby

Thursday, November 13, 2014

Easy Homemade Creamy Mushroom Soup

How many of us have said the term "I don't eat fungus." *Raises hand* Yeah, well... now I do. After my son was born, my parents came into town and took us out to dinner at a really cool restaurant in Austin called the treehouse. We drank wine. A few glasses. Then our food came. Mine had unexpected mushrooms. Due to my buzz, I tried mushrooms for the very first time. I've never looked back. They are so savory and delicious. I could eat them with every meal.

Since that meal, I have been finding fun ways to put mushrooms in everything. Well folks, I have found the perfect recipe. It is by no means health food. It is, however, ridiculously delicious!

Creamy Mushroom soup:


Ingredients:

5 cups of sliced mushrooms
1 1/2 cups chicken or vegetable broth
3 cloves garlic.. chopped up small(We LOVE garlic in this family... you can use less, if you want to)
3 tbsp butter
3 tbsp flour
1/2 chopped small onion
1 cup heavy cream or half and half
Season to taste with thyme, salt and pepper (to be honest, I never do this... I leave it out and it is delicious without it)

Directions:

Place mushrooms, broth, onion and garlic in a large pan. Cook until mushrooms are tender. About 10-15 min.

Take it off of heat and allow it to cool for a few minutes. After it has cooled for a little while, carefully pour it into a blender (we use our ninja) and blend it up until it is smooth.

Leave that in the blender for now and put your butter in the pan. Melt it and add the flour, continuously stirring until mixed well

Next you add your mushroom blend into the pan with the butter and flour (roux).

Mix this well then add your heavy cream or half and half, stirring continuously. 

Season to taste and cook until the soup thickens. 

Put it in a bowl, cool it and Enjoy! 

Sorry missing some of the steps via picture... I was dealing with a very grumpy 2 month old and her equally as grumpy big brother! Ill post more pictures next time I make it! Enjoy!!

Wednesday, November 12, 2014

Thanksgiving paper craft decorations

Up to this point in my sons life, we have never done much for thanksgiving. His first thanksgiving he was a newborn-- 2 weeks old to be exact-- and I was still sick from my pregnancy complications and we were a complete mess. I can't even remember that day. Second, we had just moved away from family and decided not to make a 6 hour drive. We went to crackle barrel that year. Third, we actually did something. We had a "hobo thanksgiving". It was our little family plus some of my husbands childhood friends and their significant others. We had a blast, but up to that day, I don't think we even talked about thanksgiving to our son at all. He just thought we were having a dinner party. It was no big deal.

My Goal: This year will be completely different. He will be PUMPED about turkey day. We will have decorations, matching tie for him and hair bow for her. The whole 9 yards. We already have the actual day down since we are spending it with some awesome down-the-road-neighbors that I have known since I was a small child, but we have zero of the other stuff. This is my solution: Time to get crafting

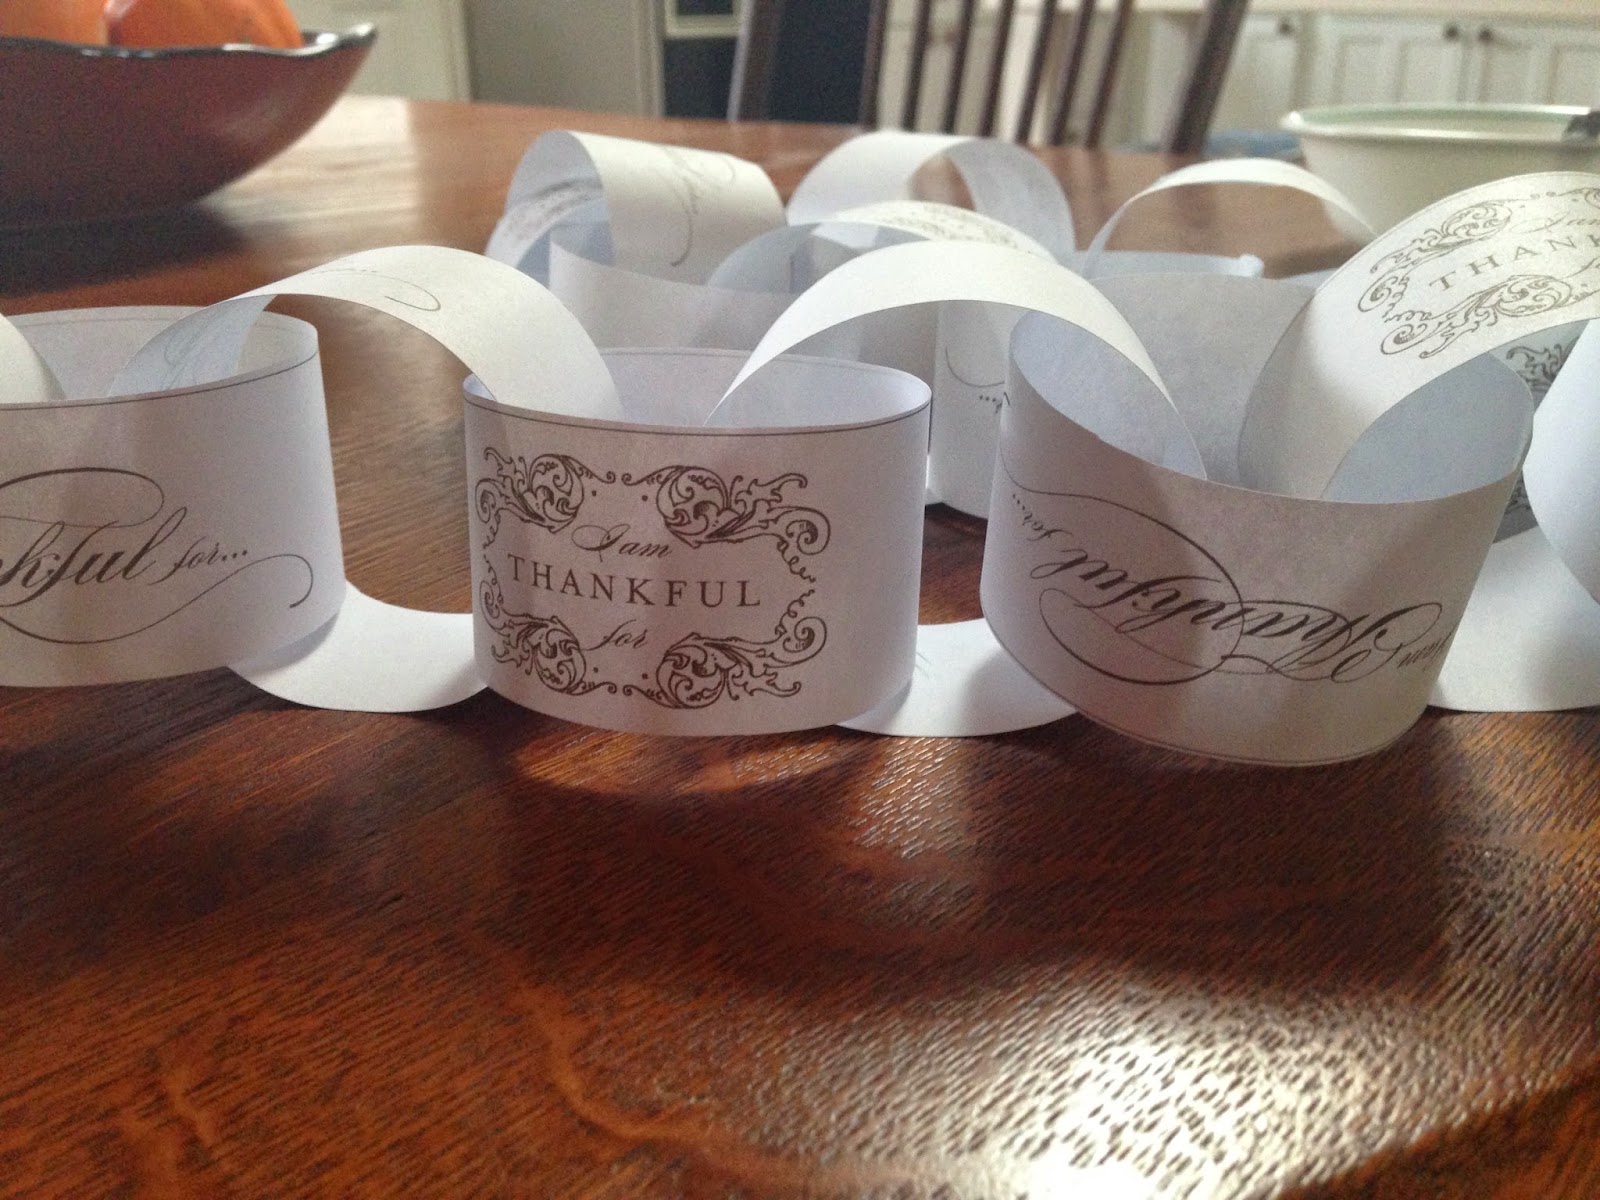
The first thing we are making is a thanksgiving countdown.


To make it, I just used this printable (for free!).

Cut it up

Fold it over on itself in a loop and tape.


Tape it together by looping each one through each other.

Repeat!

It is really fun. Some of them just say thankful and others say "I am thankful for..." . We write something on it that my son says he is thankful for each day. It makes things more exciting for him and gives him a subtle reminder of the purpose of the holiday... or at least what I think is important to take from the holiday (being thankful for what we have).

He has actually gotten really excited about saying what he is thankful for everyday. He really thinks about it. It is really sweet and those are moments you cherish as a parent (or at least I do!) so it is very worth the paper and time!

Silhouette banner

I used this printable and this printable (free!) and some "scrapbooking" paper I had laying around... construction paper will work too!

You'll also need scissors, tape and sting/yarn

I cut the silhouette pictures out at about 6" by 4" with the pictures in the center.

Next I cut my scrapbooking paper to about 8" by 5"

I then taped the silhouettes onto the paper in the center, about a half an inch from the top.

Next, I cut a triangle out of the bottom.

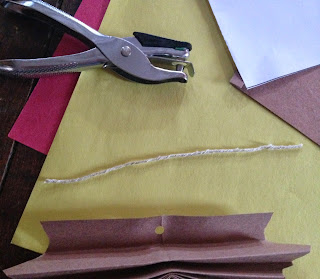
Then I hole punched the top two corners of each piece.

Put it on the string

And hung it up!


Next we made folded leaf banners

The folded leaf is one of my favorite crafts this year! Its so easy and really cute! First, you'll need this printable (for free!)

also you'll need:
Scissors
Hole punch
Tape
Construction paper
String
 First you'll need to cut out your pattern and line it up to the folded edge of your construction paper. If you do large construction paper "hotdog" fold, you will have enough room for 2.
 Cut it out, leaving the folded edge uncut
 Fold the longest side up 1/2 inch
 Continue to fold 1/2 inch at a time accordion style.
 Do this all the way up the paper
 fold it in half so that he long side is in the middle and short on the outside
 lay it flat again and hole punch in the middle on the short side
 Cut a 6" piece of string
 Tie the string around the hole.. gently.. you don't want to rip the paper
 Next, take the middle pieces (long sides) together.. making sure tape the top so it stays snug together
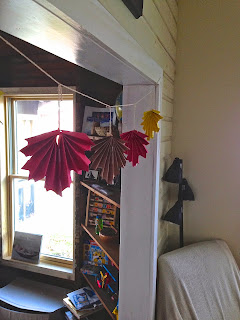
 Tie it onto the string you will hang it with & repeat
Hang it up! (or have your freakishly tall husband hang it up...like in my case lol)
 Enjoy!