Sunday, November 16, 2014

DIY easy cloth diaper wipe spray free of harsh chemicals

Little girl has been having a rough time with diaper rash and other skin irritations since she was born 2 months ago. It seems she got her daddy's ultra sensitive skin. I would say poor girl but her daddy's skin is also naturally flawless so I can't feel too bad for either of them, haha.

I hate seeing my little girl uncomfortable, so I have made it my priority to remove any chemicals that may irritate her skin

Since we already got rid of store bought diaper rash cream, store bought diapers and store bought wipes... It seems as if it is time to remove the store bought wipe solution as well. 

What you need:


1tbsp Which hazel
3 tbsp Liquid aloe Vera
essential oil- I use 4 drops lavender
1 tbsp Moisturizing oil- I use jojoba oil
5oz spray bottle
4tbsp Water

What you do:

Put all of the ingredients in the bottle and shake it a little. Easy as that!
As always... research the EO you use from peer reviewed sources before using it!! They can be harmful and/or irritating!

To use:

Shake it up.
Spray it directly on baby's tush or spray on the wipe.
Clean baby as usual.


Friday, November 14, 2014

Easy Diaper Rash Cream

Since the little miss was born almost 2 months ago, we have spent a lot of that time battling diaper rashes. Her skin seems to be extremely sensitive to pretty much everything. We've used A&D ointment and Butt paste but neither seems to be doing much. We also just started using our homemade diaper liners for our gDiapers and my homemade faux gDiapers. This posed another issue in the tushy department. Butt paste and A&D don't wash off easy from cloth. They can actually ruin the absorbency of some fabrics. This is where my usual "I'll just make something" came into play.

I just used what I had laying around and something I knew would wash well but still help my sweet one fend off the diaper rash.

What you need:

1/4 cup coconut oil
Essential oils- I used 10 drops of lavender
Stove pot
4 oz glass container

What you do:

 Put coconut oil in a small pot


 Heat the coconut oil until it is completely clear on low setting. Be careful not to boil or burn it.


Put 10-15 drops of your EO into your 4oz glass. Make sure you research your EO from a peer reviewed source before using it on your babies skin! Some are bad for little ones and/or can cause irritation. I chose lavender because it is proven to have a calming effect on some people. Im always down for a calm baby, haha.


 Pour your coconut oil into your container & mix.
 Put it in the fridge to cool completely. Its done when it's solid and white.
 Label it :)
 You only need to use a TINY amount. you can keep it refrigerated or just be sure to discard it if it smells funny or you see any irritation on your baby at all. My little girls bum loves it. It also smells lovely! I'll never use store bought cream again! Enjoy!

Happy Baby

Thursday, November 13, 2014

Easy Homemade Creamy Mushroom Soup

How many of us have said the term "I don't eat fungus." *Raises hand* Yeah, well... now I do. After my son was born, my parents came into town and took us out to dinner at a really cool restaurant in Austin called the treehouse. We drank wine. A few glasses. Then our food came. Mine had unexpected mushrooms. Due to my buzz, I tried mushrooms for the very first time. I've never looked back. They are so savory and delicious. I could eat them with every meal.

Since that meal, I have been finding fun ways to put mushrooms in everything. Well folks, I have found the perfect recipe. It is by no means health food. It is, however, ridiculously delicious!

Creamy Mushroom soup:


Ingredients:

5 cups of sliced mushrooms
1 1/2 cups chicken or vegetable broth
3 cloves garlic.. chopped up small(We LOVE garlic in this family... you can use less, if you want to)
3 tbsp butter
3 tbsp flour
1/2 chopped small onion
1 cup heavy cream or half and half
Season to taste with thyme, salt and pepper (to be honest, I never do this... I leave it out and it is delicious without it)

Directions:

Place mushrooms, broth, onion and garlic in a large pan. Cook until mushrooms are tender. About 10-15 min.

Take it off of heat and allow it to cool for a few minutes. After it has cooled for a little while, carefully pour it into a blender (we use our ninja) and blend it up until it is smooth.

Leave that in the blender for now and put your butter in the pan. Melt it and add the flour, continuously stirring until mixed well

Next you add your mushroom blend into the pan with the butter and flour (roux).

Mix this well then add your heavy cream or half and half, stirring continuously. 

Season to taste and cook until the soup thickens. 

Put it in a bowl, cool it and Enjoy! 

Sorry missing some of the steps via picture... I was dealing with a very grumpy 2 month old and her equally as grumpy big brother! Ill post more pictures next time I make it! Enjoy!!

Wednesday, November 12, 2014

Thanksgiving paper craft decorations

Up to this point in my sons life, we have never done much for thanksgiving. His first thanksgiving he was a newborn-- 2 weeks old to be exact-- and I was still sick from my pregnancy complications and we were a complete mess. I can't even remember that day. Second, we had just moved away from family and decided not to make a 6 hour drive. We went to crackle barrel that year. Third, we actually did something. We had a "hobo thanksgiving". It was our little family plus some of my husbands childhood friends and their significant others. We had a blast, but up to that day, I don't think we even talked about thanksgiving to our son at all. He just thought we were having a dinner party. It was no big deal.

My Goal: This year will be completely different. He will be PUMPED about turkey day. We will have decorations, matching tie for him and hair bow for her. The whole 9 yards. We already have the actual day down since we are spending it with some awesome down-the-road-neighbors that I have known since I was a small child, but we have zero of the other stuff. This is my solution: Time to get crafting

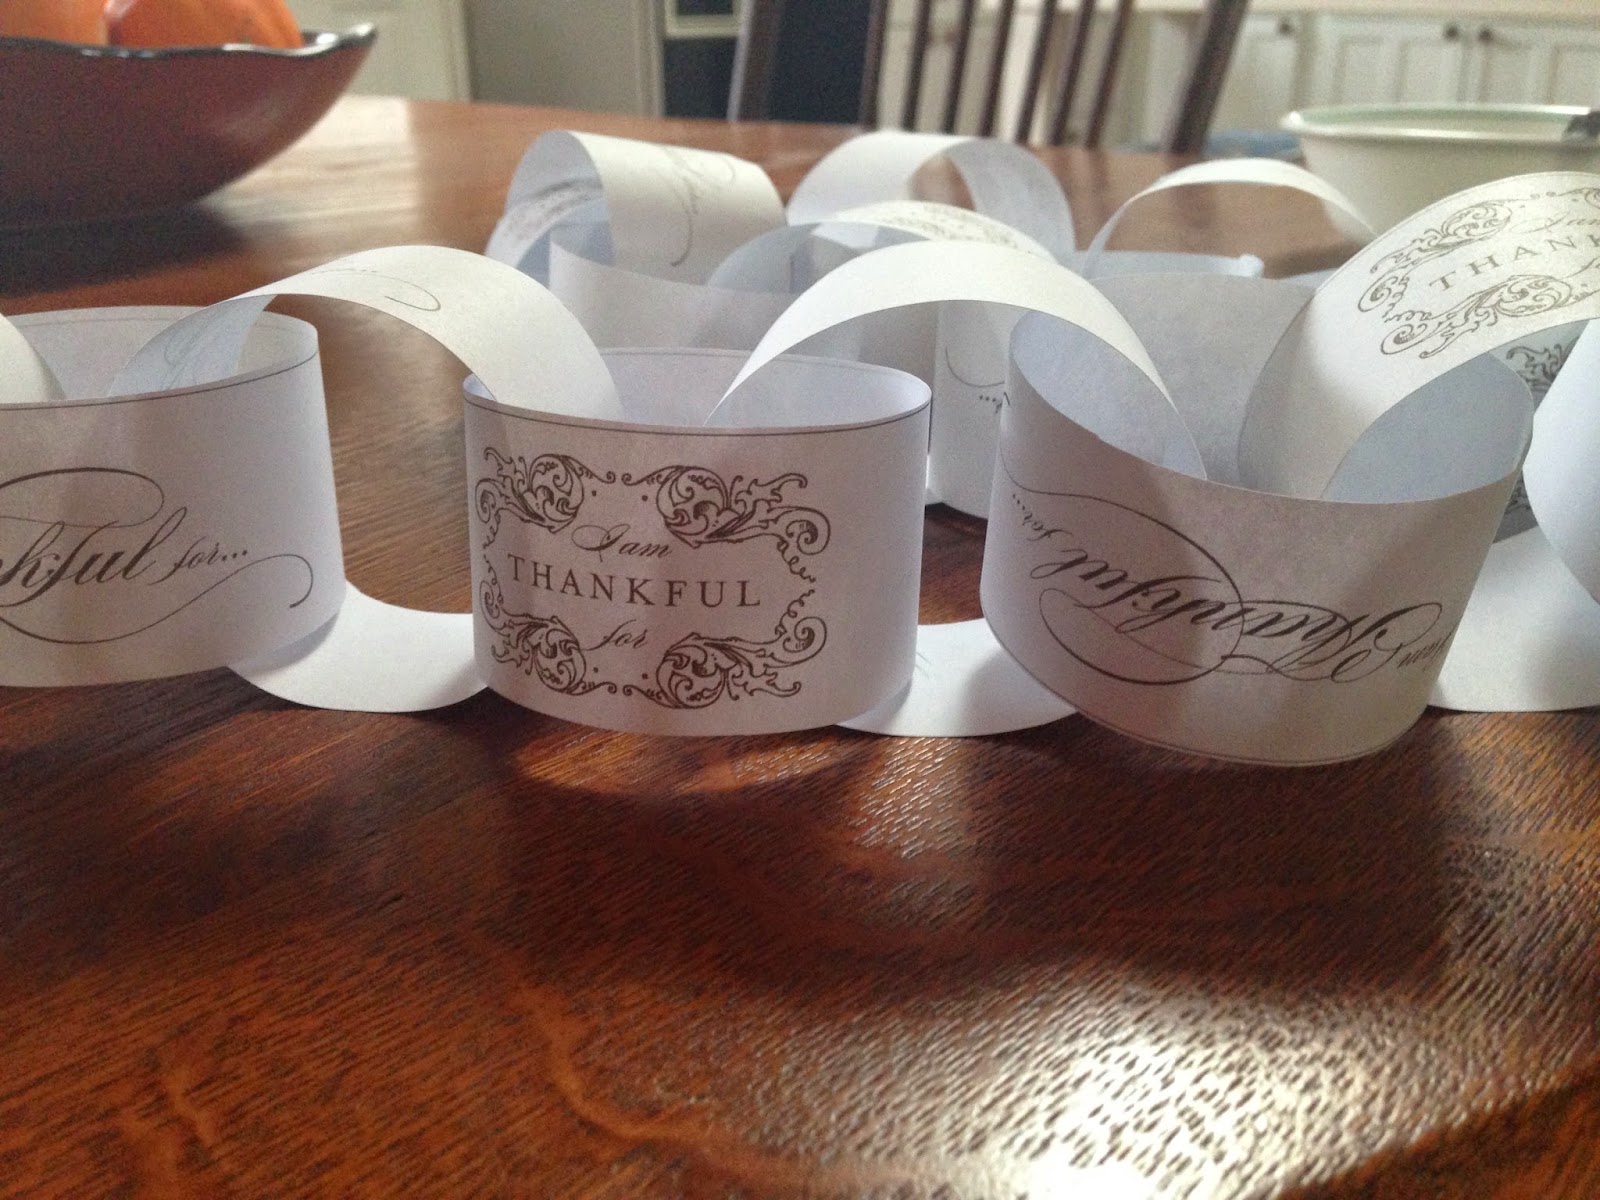
The first thing we are making is a thanksgiving countdown.


To make it, I just used this printable (for free!).

Cut it up

Fold it over on itself in a loop and tape.


Tape it together by looping each one through each other.

Repeat!

It is really fun. Some of them just say thankful and others say "I am thankful for..." . We write something on it that my son says he is thankful for each day. It makes things more exciting for him and gives him a subtle reminder of the purpose of the holiday... or at least what I think is important to take from the holiday (being thankful for what we have).

He has actually gotten really excited about saying what he is thankful for everyday. He really thinks about it. It is really sweet and those are moments you cherish as a parent (or at least I do!) so it is very worth the paper and time!

Silhouette banner

I used this printable and this printable (free!) and some "scrapbooking" paper I had laying around... construction paper will work too!

You'll also need scissors, tape and sting/yarn

I cut the silhouette pictures out at about 6" by 4" with the pictures in the center.

Next I cut my scrapbooking paper to about 8" by 5"

I then taped the silhouettes onto the paper in the center, about a half an inch from the top.

Next, I cut a triangle out of the bottom.

Then I hole punched the top two corners of each piece.

Put it on the string

And hung it up!


Next we made folded leaf banners

The folded leaf is one of my favorite crafts this year! Its so easy and really cute! First, you'll need this printable (for free!)

also you'll need:
Scissors
Hole punch
Tape
Construction paper
String
 First you'll need to cut out your pattern and line it up to the folded edge of your construction paper. If you do large construction paper "hotdog" fold, you will have enough room for 2.
 Cut it out, leaving the folded edge uncut
 Fold the longest side up 1/2 inch
 Continue to fold 1/2 inch at a time accordion style.
 Do this all the way up the paper
 fold it in half so that he long side is in the middle and short on the outside
 lay it flat again and hole punch in the middle on the short side
 Cut a 6" piece of string
 Tie the string around the hole.. gently.. you don't want to rip the paper
 Next, take the middle pieces (long sides) together.. making sure tape the top so it stays snug together
 Tie it onto the string you will hang it with & repeat
Hang it up! (or have your freakishly tall husband hang it up...like in my case lol)
 Enjoy!